5.4.1 build 51 release notes
2.) Teller info is kept for Voids and Vault Transactions.
3.) The all-in-one reporting window.
1.) digiCHECK.net is now integrated.
2.) Check Approval through digiCHECK.net
3.) Lookup customer through reverse SSN or phone number.
4.) Lookup and view check through digiCHECK.net
5.) Enforcing a teller check cashing limit.
6.) Round off the change (for check-cashing fees)
7.) Get Customer info from a Credit Card or Drivers License.
9.) Import Customers/Makers that have been flagged.
MOPS - Turn the payout confirmation screen on or off.
OTC - There is a new, updated Preprint File.
PayDay Loan - Access to Customer Maintenance
BPS - Cell Cards and PIN numbers
ATS
1.)
Create Multiple Deposits
At some locations, it is necessary to send more than one deposit in any 24 hour period. Recording which checks are included in which deposit makes accounting much easier for the main office. There is now a feature in ATS that allows for this type of record keeping.
To enable this feature, open the ATS Setup application.

In the Store Setup window of ATS Setup, there is a checkbox in the bottom right portion of the screen Comment for Multiple Deposits.
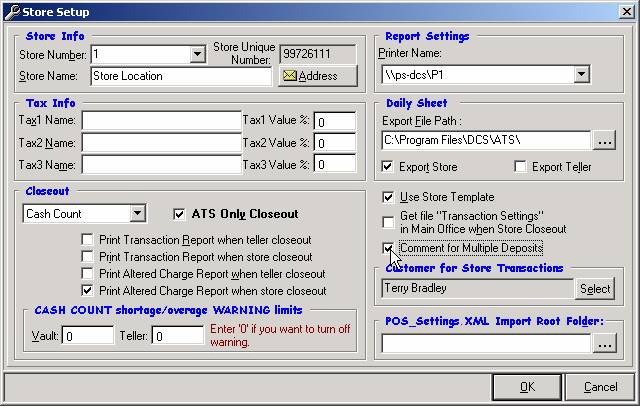
When checked, the Comment for Multiple Deposits option brings up a new screen during the Store Closeout.
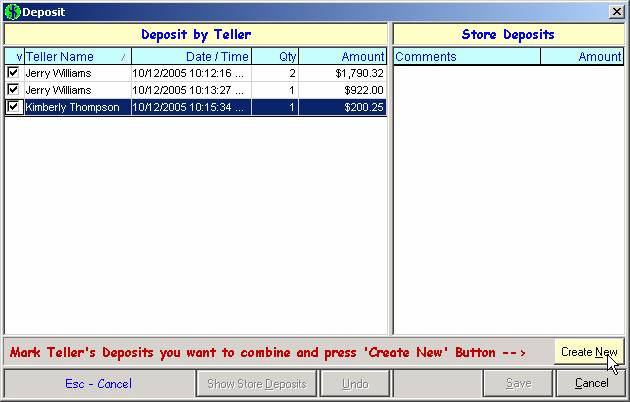
A list of deposits appears on the right side of the screen. There should be one for each teller who processed checks in this session. If a teller uses the Closeout Deposit feature, then they may have more than one entry.
Place a check mark next to each item that was included in the first deposit and click the Create New button. Then, check off the items included in the second deposit and click Create New again. Repeat this for however many deposits were created.
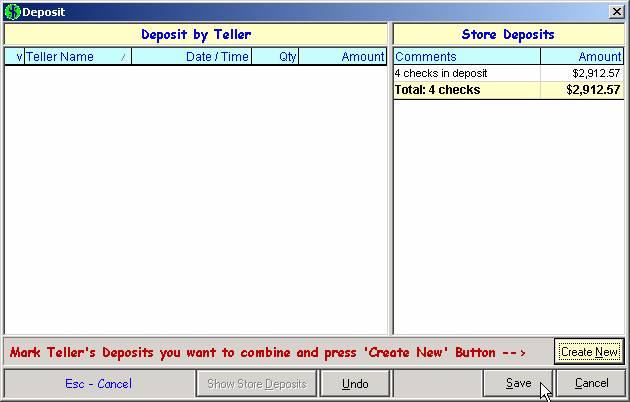
Stores with a Main Office send their Store Daily Sheets automatically during the closeout procedure. When deposits have been combined, a comment is included in the Daily Sheet when it is sent. This comment gives the breakdown of how many checks were in each deposit and the total amount for each deposit.
The Main Office would see something like this for the example above…
Comments:
1790.32 2 check(s) in deposit
922 1 check(s) in deposit
200.25 1 check(s) in deposit
2.) Teller info is kept for Voids and Vault
Transactions.
A user that is “in the Vault” means that they have clicked the Vault button and are in control of Vault Inventory and other Vault Transactions. In previous versions of the software, the system did not keep track of which user processed Vault transactions.
Now, when a user clicks Vault, the system records any transactions that user enters. This information can then be looked up for the current session or for previous sessions by clicking on All Vault Transactions Lookup.
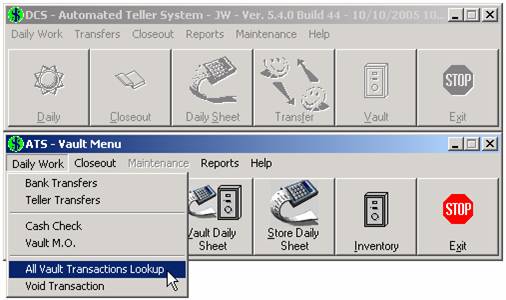
Click on the Vault button, then the Daily Work menu. Choose All Vault Transactions Lookup.
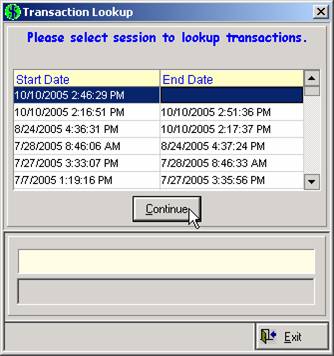
The top session in the list is the current session. Scroll down to view past dates.
NOTE: The user who placed or voided Vault transactions is only recorded once the store has upgraded to 5.4.1.53. So, any session prior to the upgrade will not have this data available.
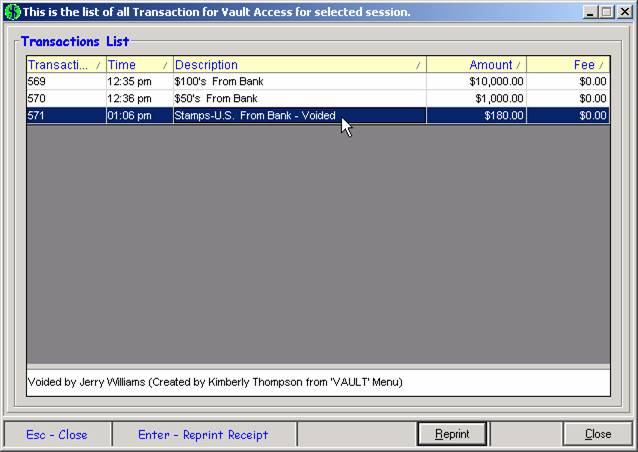
Arrow down to the Vault transaction you are interested in. At the bottom of the screen, notes display the user who entered the transaction. If the transaction has been voided, the note also display who voided it.
In the example above, Kimberly Thompson transferred $180 worth of US Stamps from the bank. Later on a user named Jerry Williams voided the transaction.
From the Void Transactions screen, the same notes are displayed. Because transactions can only be voided for the current session, the All Vault Transactions Lookup function must be used to view previous session info.
IN ALL DCS PROGRAMS: A receipt now prints automatically when a transaction is voided (or unvoided).
3.) The all-in-one reporting window.
It is no longer necessary to navigate through numerous menus
to find the report you’re looking for.
Now, through an option labeled ATS
System Reports you can bring up any report available through ATS.
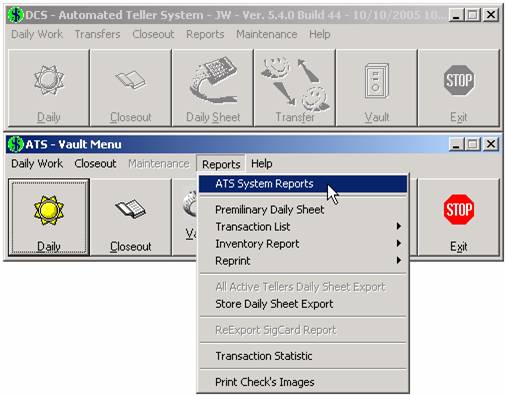
First go into the Vault menu, and then into the Reports. The top option is ATS System Reports.
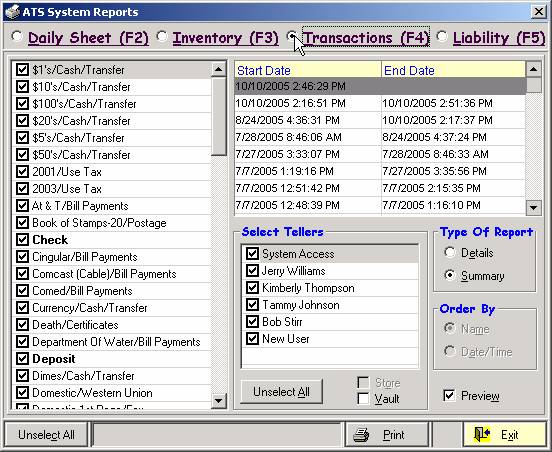
First, decide which type of report you want at the top of the screen—Daily Sheet, Inventory, Transactions, or Liability. Choose the corresponding radio button. The template on the left adjusts automatically to the type of report chosen.
Basically, the user can customize any type of report from this one window. Just check all the desired options and click Print.
SIGCARD
1.) Setting up digiCHECK.net
Contact your DCS sales representative
for information on activating your digiCHECK.net account. Different services have been made available
that are fully integrated with Sigcard and can be activated at the click of a
button.
digiCHECK.net –Setup instructions for check archive
service
Through digiCHECK.net, all
check images are stored on digiCHECK’s web
server. They can then be looked up and
viewed from anywhere there is an internet connection. Used together with Sigcard, these checks can
automatically be uploaded at time of closeout, and viewed when verification is
needed.
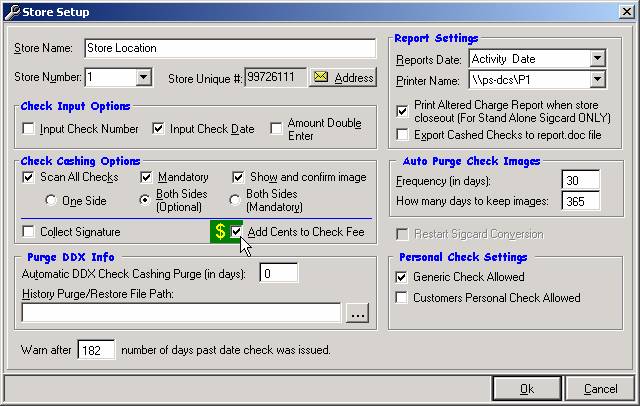
First make sure that in Store
Setup, Input Check Number and Both Sides (Mandatory) are check
marked. Checks cannot be exported to
digiCHECK.net unless these settings are stored.
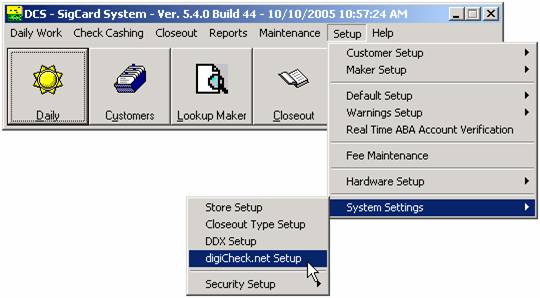
Then, go into the digiCheck.net Setup from the System Settings menu.
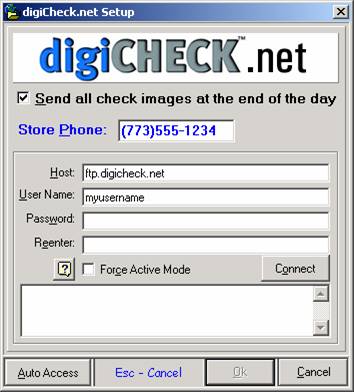
From here, the digiCHECK.net
account information must be entered. The
connection has to be tested with a successful reply before these settings can
be saved. Do this by clicking the Connect button. Once the connection is successful, the Ok button is enabled. Click Ok.
Check the box at the top of
the screen to automatically send the check images at closeout.
digiCHECK.net –Setup instructions for reverse SSN /
telephone lookup
Another digiCHECK.net service
offers valuable search features that allow for reverse telephone and social
security number lookup. It helps the
user verify customer identity and also compares the customer name against the
OFAC database (Office of Foreign Assets Control). Once you have a valid account, click the Auto Access button at the bottom
left of the digiCHECK.net setup screen.
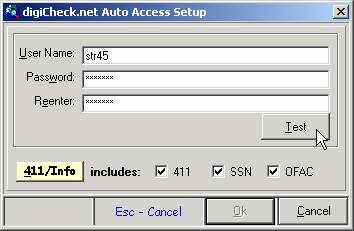
Enter your user name and
password. The password must be entered
twice to avoid typos and misspellings.
At the bottom of the screen
are three check boxes labeled 411, SSN, and OFAC. What is checked here determines what is
returned when the 411/Info
button is pressed. The box next to 411
is mandatory and cannot be unchecked.
The other two are optional.
Click the Test button. A successful test opens a web browser to the
Directory Assistance page. The Ok button is not enabled until a
successful test has been performed.
Click Ok to save your settings.
2.) Check Approval through digiCHECK.net
In certain situations it is necessary to get manager approval before cashing a check. Obvious challenges arise at stores where a manager is not on site that (in the past) have made this process inaccurate.
Now, through digiCHECK.net, the check image and all relevant information is passed to a main office instantly. At the click of a button, the teller requests check-approval and is automatically notified once a manager has reviewed it.
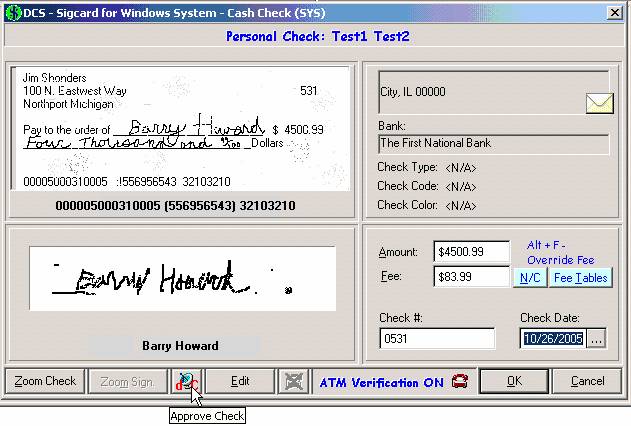
Both sides of the check must be scanned to enable the Approve Check button at the bottom of the screen. If the check matches certain criteria based on store policy, the teller pushes this button.
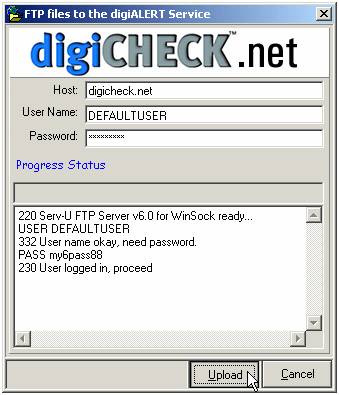
The above fields fill in with data from the digiCHECK.net setup screen. Simply click the Upload button.
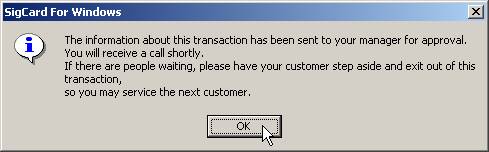
A final screen says to continue servicing other customers while waiting for approval.
3.) Lookup customer through reverse SSN or
phone number. MUST HAVE VALID ACCURINT
ACCOUNT!!!
Verify customer data by clicking the OFAC and 411/Info buttons. To use this feature, you must have a valid account with Accurint and your username and password set in the Auto Access screen described above.
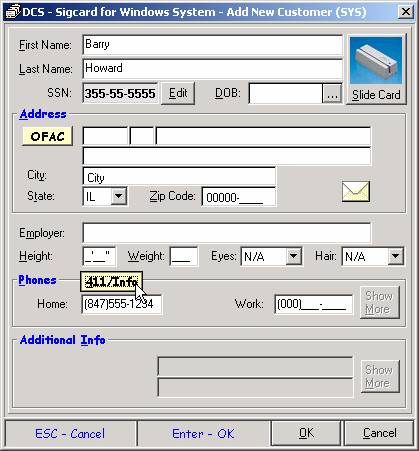
When adding a new customer, key-in the phone number and click the 411/Info button. Your web browser opens as seen here.
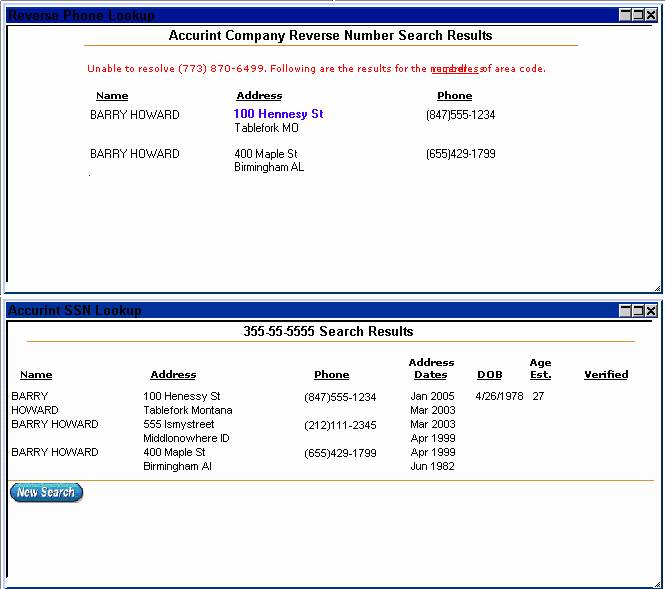
Above is an example of a fictitious customer and the search results. This information can then be used to verify the customer’s identity.
Similarly, in the Address section is the OFAC button.

The Office of Foreign Assets Control ("OFAC") maintains a database of known terrorists, international narcotics traffickers, and those engaged in activities related to the proliferation of weapons of mass destruction. The OFAC button in Sigcard compares the customer name with this database and returns any similarities.

Most names should return the “No matches found” message as seen in the example above. Should the name match an entry in the OFAC database, the matching name and address is displayed with a toll free number to contact the OFAC office.
4.) The
digiCHECK.net check imaging archive service.
Ask your DCS salesperson how to activate this feature!!!
Once the imaging archive service is activated and your checks are set to upload at the end of the day, all newly scanned check images are stored on the digiCHECK.net server. You can then access these images at any time and from anywhere—all you need is an internet connection. Through Sigcard, direct access to the relevant check image is available at the time of transaction with the simple click of a button.
From the Customer Information window, History in Another Stores is enabled when more data is available than what is seen on the screen. It is through this button that a user has access to the digiCHECK.net archive service.
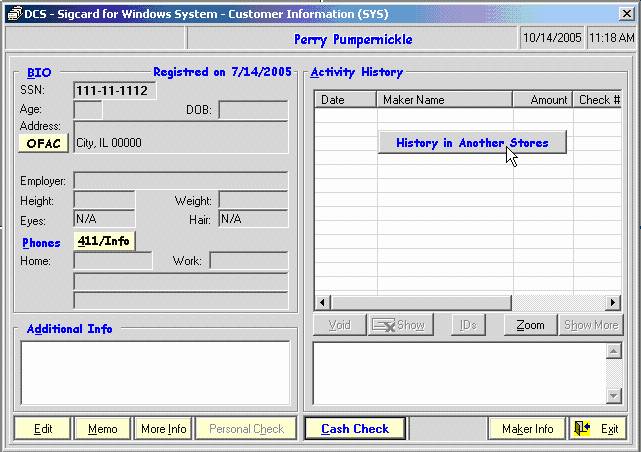
Under the Activity History, click the History in Another Stores button.
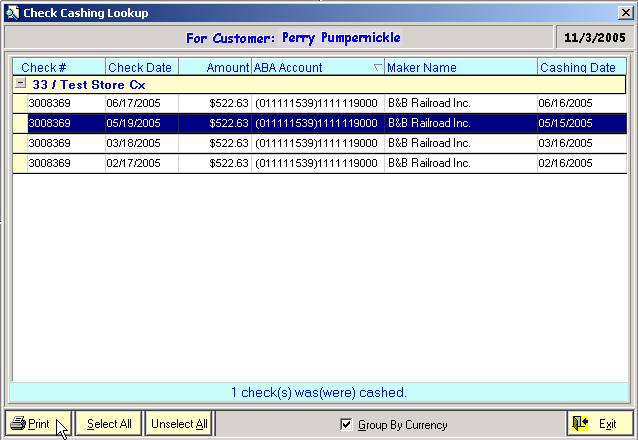
Highlight a check by clicking on it with the mouse. The Select All button can be used to choose multiple checks at once.
If the check image has been uploaded to digiCHECK.net, the image is viewed by clicking the Print button.
5.) Enforcing a teller check cashing limit.
There is a new security feature installed which will prohibit tellers from cashing checks over their prescribed limit. In the past, a warning was displayed that allowed the teller to continue. In this release, security can be enforced so only a manager or a manager's 1-time code can be used to continue.
If the user attempts to cash a check above their limit, the following screen appears.
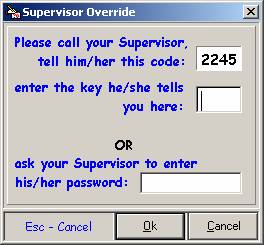
For off-site managers, the teller calls with the four digit code (2245 in this example) and the manager can grant or deny permission. To grant permission, the manager would respond with a code that allows the user to complete the transaction.
On-site managers can simply type a high-level password into the bottom field, bypassing this screen.
To set this up, first create a Supervisor Password.
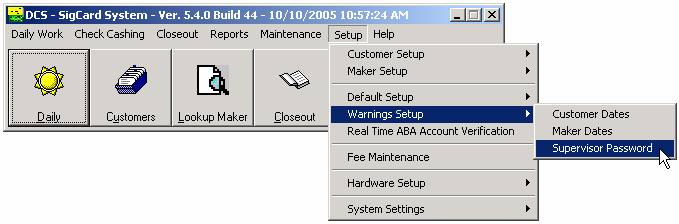
From the Setup menu, click on Warnings Setup, and Supervisor Password.
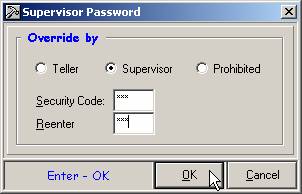
Be sure Supervisor is marked to activate this password. Enter the Security Code of your choice and click OK (must be a number between 100 and 998). This will be used to calculate the 1-time password when overriding a check limit. The specifics of the 1-time password will be made available to owners in a future correspondence.
NOTE: The Supervisor Password is also used to prevent tellers from changing fees, as well as cashing checks over a prescribed maker limit. This is explained in detail in the sections that follow.
The next step is setting the check limit for each user; this is done from the user setup screen. Click on the Setup menu and then choose System Settings -> Security Setup -> User Setup.
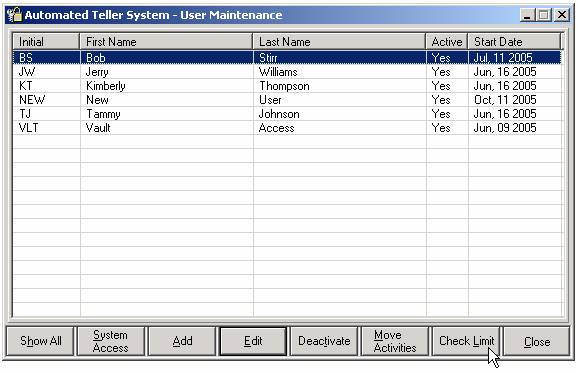
Highlight the user and click the Check Limit button.
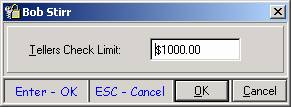
Enter the new Check Limit and click OK. Repeat this procedure to adjust the check limit for other users.
Finally, turn this feature on (or off) by clicking the Setup menu and choosing System Settings -> Security Setup -> Module Setup.
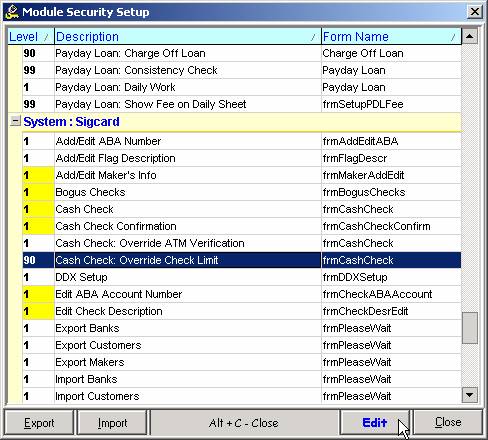
Scroll down until you find the item Cash Check: Override Check Limit. Click Edit.
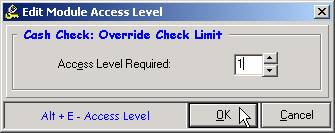
The typical user has a security access level of 1. Setting the required access level above 1 enforces the check limit. In this case, the user cannot complete the transaction without managerial approval. Setting this field to 1, on the other hand, allows the user to bypass the check limit. Adjust this value and click OK to save changes.
6.) Round off the change (for check-cashing
fees)
Some stores have requested a
special type of fee for check cashing.
The fee is first calculated according to a certain percentage or
following other formulas as it was previously.
Then when the payout is calculated, the cents part is added to the fee
so that a round dollar amount is handed to the customer.
This speeds up the average
customer wait-time and eliminates the need for stores to carry large amounts of
coin.
To use this type of fee, first
setup the fee as usual in the Fee
Maintenance section. Set this fee as
the default under Default Setup.
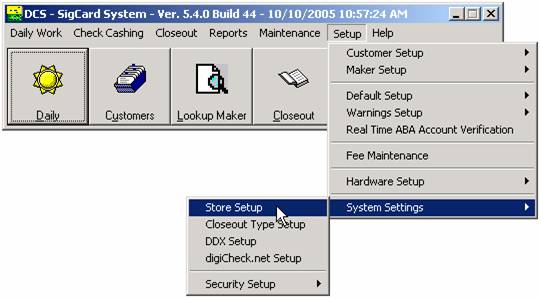
Next, go into the Store Setup window under System Settings.
There is a new option seen
above above—Add
Cents to Check Fee.
Place a check mark here to
round off your payouts.
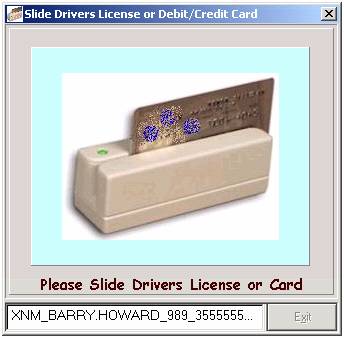
7.) Get Customer info from a Credit Card or
Drivers License.
This feature is also used in
the License module as well as Payday Loan.
Anywhere you see the blue Slide
Card button, the customer information can be
retrieved by sliding a Credit Card or Drivers License (in states with magnetic
stripe).
NOTE: The information stored
on a Credit Card varies depending on what State you are in.
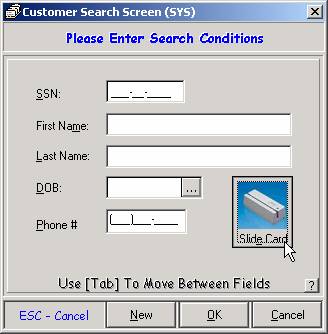
Click the Slide Card button from the Sigcard customer search screen.
Slide the credit card through a magnetic strip reader, and the customer information fills in automatically.
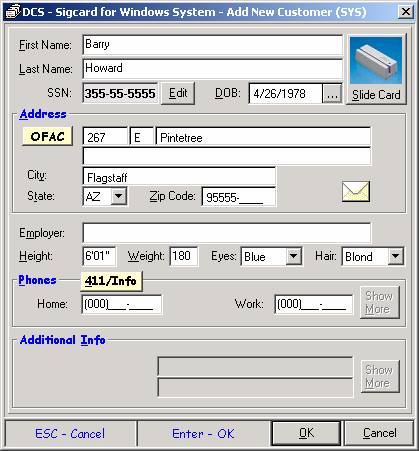
In the example above, any data that is read from the Credit
Card/Drivers License is matched to the relevant field. States that have a magnetic strip on the
Drivers License, for example
8.) Large item report.
A new searching option allows you to bring up only checks
that are over a specified amount. This
special report satisfies
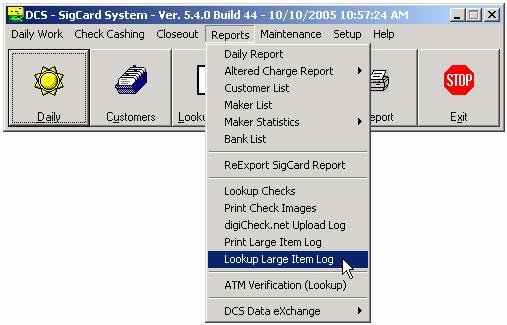
Under Reports, go to Lookup Large Item Log.
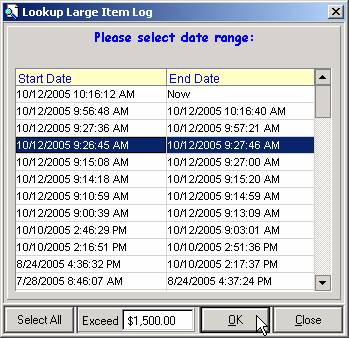
Simply choose the session(s) and enter the amount in the Exceed box. Then click OK.
A list of checks matching your criteria is displayed.
9.) Import Customers/Makers that have been
flagged.
This is a feature generally run at time of installation for stores that are sharing data with a Main Office.

This option is found in the Maintenance menu of Sigcard under Admin.
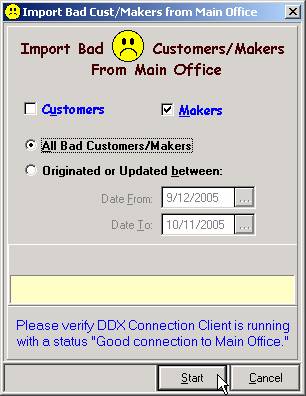
Fill in the desired settings and click start. DDX Client connects to the main office and transfers the flagged customers/makers for the specified date range.
MOPS
Turn the payout confirmation screen on or
off.
Under Setup -> System Settings -> Store Setup, there is a new
option labeled Confirm Total Amount.
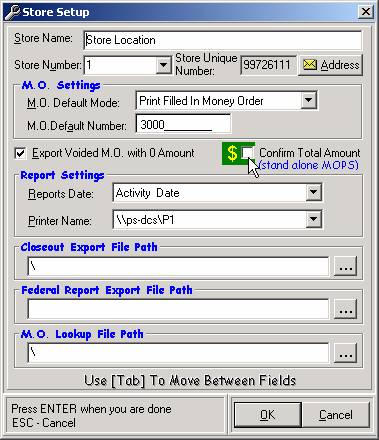
This option is only valid
when using stand alone MOPS (not valid for ATS systems).
It allows you to skip the final
screen when printing a MO (the screen that asks for amount collected).
OTC
There is a new, updated Preprint File.
The Preprint file holds data
for all customers who purchased a city sticker the previous year. It makes it possible to process a city
sticker transaction by simply entering the Preprint number into the OTC module.
Upon upgrading to 5.4.0.44,
your OTC system is immediately up-to-date with this information.
PayDay Loan
Access to Customer Maintenance
Setup flags and memos, or edit
customer information directly through Payday.
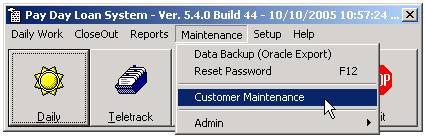
From the Maintenance menu, choose the Customer
Maintenance option.
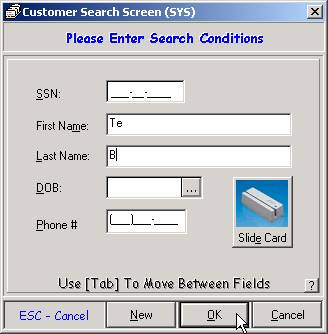
As in Sigcard, the Customer
Search screen appears. Fill in the
fields above with the minimal amount of data to find the desired customer. Once the customer is found, the following
screen appears.
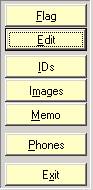
From here, click on any of
the yellow buttons to add flags, memos, or change information about the
customer. The memo and flag will appear
during the transaction to alert the teller of any important information in
regards to this customer.
BPS
Cell Cards and PIN numbers
Similar to Visa Gift Cards, BPS now has the ability to load and sell Cell Phone cards as well as PIN numbers.
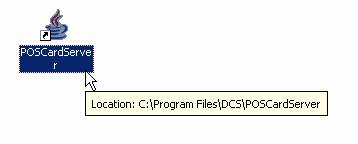
POSCardServer has replaced VGC Server. Similarly, it must be running at all times to process Visa Gift Cards and Cell Cards.
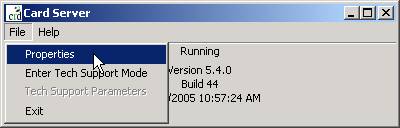
In the Properties section you will find two tabs, one for VGC and one for cell cards. The same fields are there for VGC—terminal id, sequence number, URL.
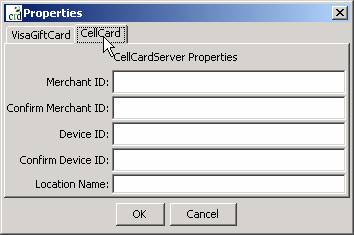
Similarly, the fields for cell cards are seen above. Enter and confirm the Merchant ID and Device ID.
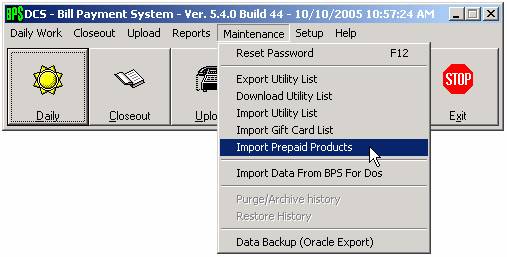
Once the Card Server properties are set up, the Import Prepaid Products fills the menu with the Cell Card transactions.
To sell the physical cards, a mag stripe reader is required. The card is then loaded by swiping it through at the time of the transaction. To sell PINS, a receipt printer (any printer will actually work) is required. This is because the PIN number prints onto the receipt. Both the PIN number and the cards are POSA activated, meaning you don’t have to pay until the transaction is processed.